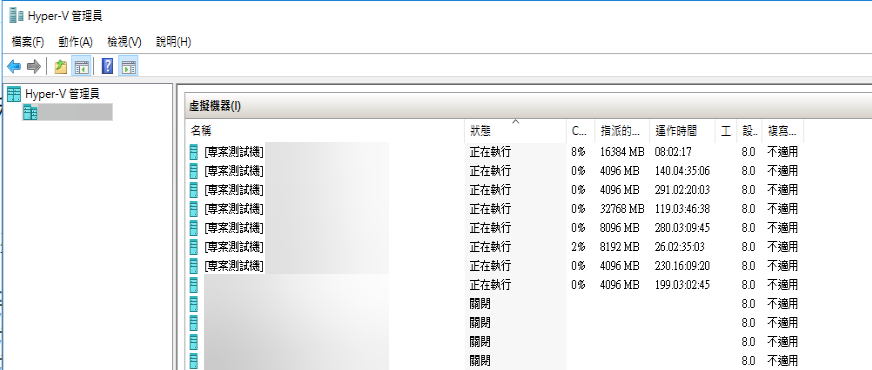
我現在已經很少在公司內部部署測試機的 VM 了,我通常都直接在 Azure 上面部署測試機,用完就砍掉,透過 Azure CLI 基本上兩分鐘就可以搞定一台,非常方便。不過,我們有個專案的測試機所需的負載比較大,開在雲端比較燒錢,所以還是在內部部署比較划算,但設定的步驟都快忘光了。這篇文章我打算記錄一下這個過程,提供日後參考之用。

管理 VM 常用的 Cmdlets
-
建立 VM
$VMName = 'Test1'
$SWName = 'HV-MNA-LAN #01'
$VMPath = 'D:\Hyper-V'
$GiB = 1024*1024*1024

# 儲存建立的 VM 物件,可以方便後續進行設定
$VM = New-VM -Name $VMName -SwitchName $SWName -Path $VMPath `
  -NewVHDPath "${VMPath}\${VMName}\Virtual Hard Disks\${VMName}.vhdx" `
  -MemoryStartupBytes ([int64]8*$GiB) -Generation 1 -NewVHDSizeBytes ([int64]127*$GiB)
取得 VM 物件
$VM = Get-VM $VMName
注意: Get-VM 支援 Wildcards (萬用支援),所以針對一些特殊字元比較敏感,使用時要特別注意,必要時要用到 ` 跳脫字元。
取得所有虛擬機名稱包含「專案測試機」字樣的 VM
$VM = Get-VM '*專案測試機*'
變更 VM 名稱
$VM | Set-VM -NewVMName '[專案測試機] Test1'
-
設定 CPU 核心數
$VM | Set-VMProcessor -Count 2
-
設定 CPU 支援巢狀虛擬化 (Nested Virtualization)
$VM | Set-VMProcessor -ExposeVirtualizationExtensions $true
-
設定動態記憶體配置 (Dynamic Memory Allocation)
$VM | Set-VMMemory -DynamicMemoryEnabled $true
-
設定 DVD 光碟機掛載檔
$VM | Get-VMDvdDrive | Set-VMDvdDrive -Path "E:\ISOs\en_windows_server_2016_updated_feb_2018_x64_dvd_11636692.iso"
-
啟動 VM
$VM | Start-VM
-
關閉 VM
$VM | Stop-VM -Force
-
刪除 VM
$VM | Remove-VM -Force
快速開啟 VMC 連線 (vmconnect.exe)
我從 Connecting to Hyper-V virtual machines with PowerShell 發現有人寫了一個相當方便的 Function 可以快速開啟 VMC 連接 VM,我就直接沿用了!
function Connect-VM {
    [CmdletBinding(DefaultParameterSetName = 'name')]

    param(
        [Parameter(ParameterSetName = 'name')]
        [Alias('cn')]
        [System.String[]]$ComputerName = $env:COMPUTERNAME,
        [Parameter(Position = 0,
            Mandatory, ValueFromPipelineByPropertyName,
            ValueFromPipeline, ParameterSetName = 'name')]
        [Alias('VMName')]
        [System.String]$Name,

        [Parameter(Position = 0,
            Mandatory, ValueFromPipelineByPropertyName,
            ValueFromPipeline, ParameterSetName = 'id')]
        [Alias('VMId', 'Guid')]
        [System.Guid]$Id,

        [Parameter(Position = 0, Mandatory,
            ValueFromPipeline, ParameterSetName = 'inputObject')]
        [Microsoft.HyperV.PowerShell.VirtualMachine]$InputObject,

        [switch]$StartVM
    )

    begin {
        Write-Verbose "Initializing InstanceCount, InstanceCount = 0"
        $InstanceCount = 0
    }

    process {
        try {
            foreach ($computer in $ComputerName) {
                Write-Verbose "ParameterSetName is '$($PSCmdlet.ParameterSetName)'"
                if ($PSCmdlet.ParameterSetName -eq 'name') {
                    # Get the VM by Id if Name can convert to a guid
                    if ($Name -as [guid]) {
                        Write-Verbose "Incoming value can cast to guid"
                        $vm = Get-VM -Id $Name -ErrorAction SilentlyContinue
                    }
                    else {
                        $vm = Get-VM -Name $Name -ErrorAction SilentlyContinue
                    }
                }
                elseif ($PSCmdlet.ParameterSetName -eq 'id') {
                    $vm = Get-VM -Id $Id -ErrorAction SilentlyContinue
                }
                else {
                    $vm = $InputObject
                }

                if ($vm) {
                    Write-Verbose "Executing 'vmconnect.exe $computer $($vm.Name) -G $($vm.Id) -C $InstanceCount'"
                    vmconnect.exe $computer $vm.Name -G $vm.Id -C $InstanceCount
                }
                else {
                    Write-Verbose "Cannot find vm: '$Name'"
                }

                if ($StartVM -and $vm) {
                    if ($vm.State -eq 'off') {
                        Write-Verbose "StartVM was specified and VM state is 'off'. Starting VM '$($vm.Name)'"
                        Start-VM -VM $vm
                    }
                    else {
                        Write-Verbose "Starting VM '$($vm.Name)'. Skipping, VM is not not in 'off' state."
                    }
                }

                $InstanceCount += 1
                Write-Verbose "InstanceCount = $InstanceCount"
            }
        }
        catch {
            Write-Error $_
        }
    }
}
基本的使用方式大概有以下兩種:
-
連接 VM
$VM | Connect-VM
-
連接 VM 並自動啟動
$VM | Connect-VM -Start
常用的 VM 組合技
-
快速建立 Windows Server 2022 虛擬機器
$VMName = 'Test1'
$SWName = 'HV-MNA-LAN #01'
$VMPath = 'D:\Hyper-V'
$ISOPath = 'E:\ISOs\en-us_windows_server_2022_updated_june_2022_x64_dvd_ac918027.iso'

$GiB = 1024*1024*1024

# 儲存建立的 VM 物件,可以方便後續進行設定
$VM = New-VM -Name $VMName -SwitchName $SWName -Path $VMPath `
  -NewVHDPath "${VMPath}\${VMName}\Virtual Hard Disks\${VMName}.vhdx" `
  -MemoryStartupBytes ([int64]8*$GiB) -Generation 1 -NewVHDSizeBytes ([int64]127*$GiB)
$VM | Set-VMProcessor -Count 2
$VM | Set-VMProcessor -ExposeVirtualizationExtensions $true
$VM | Set-VMMemory -DynamicMemoryEnabled $true
$VM | Get-VMDvdDrive | Set-VMDvdDrive -Path $ISOPath
$VM | Connect-VM -Start
-
快速建立 Ubuntu Server 22.04 LTS 虛擬機器
$VMName = 'Test1'
$SWName = 'HV-MNA-LAN #01'
$VMPath = 'D:\Hyper-V'
$ISOPath = 'E:\ISOs\ubuntu-22.04-live-server-amd64.iso'

$GiB = 1024*1024*1024

# 儲存建立的 VM 物件,可以方便後續進行設定
$VM = New-VM -Name $VMName -SwitchName $SWName -Path $VMPath `
  -NewVHDPath "${VMPath}\${VMName}\Virtual Hard Disks\${VMName}.vhdx" `
  -MemoryStartupBytes ([int64]8*$GiB) -Generation 1 -NewVHDSizeBytes ([int64]127*$GiB)
$VM | Set-VMProcessor -Count 2
$VM | Set-VMProcessor -ExposeVirtualizationExtensions $true
$VM | Set-VMMemory -DynamicMemoryEnabled $true
$VM | Get-VMDvdDrive | Set-VMDvdDrive -Path $ISOPath
$VM | Start-VM
$VM | Connect-VM -Start
相關連結