經過長時間的研究,發現 ASP.NET Identity 真的是個很神奇的產品,不但官網缺乏文件,也缺乏完整的 API 文件,我實在不想讓這個好東西就此埋沒,今天特別整理 Facebook 登入後該如何將 Access Token 安全地保存在 Cookie 中。由於 Facebook 的 Access Token 有明確的到期時間,預設透過網站登入只有 2 小時的使用期限,因此沒必要像 GitHub 那樣將 Access Token 保存在資料庫中,本篇文章也一樣用逐步教學的方式,示範如何在你的網站增加 Facebook 驗證機制,並成功取得一個臨時的 Access Token。
1. 建立 ASP.NET MVC 5 專案 ( 請使用 Visual Studio 2013 開發工具 )
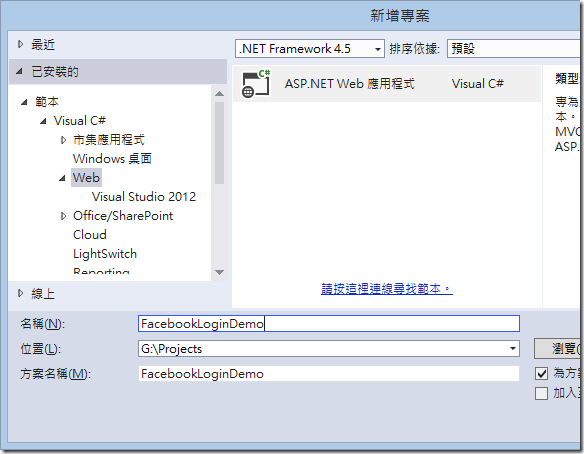
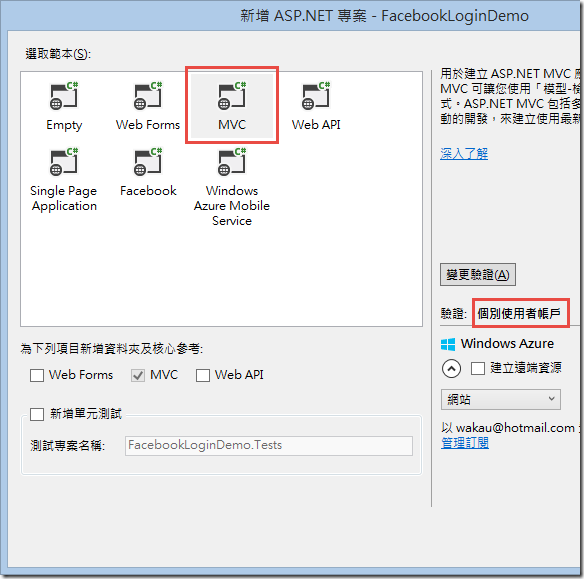
2. 修改 App_Start\Startup.Auth.cs 檔案
- 在檔案最上方新增命名空間
using Microsoft.Owin.Security.Facebook;
- 在 ConfigureAuth() 方法最下方新增以下程式:
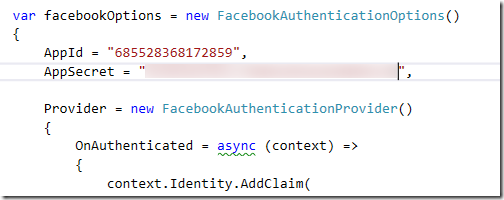
var facebookOptions = new FacebookAuthenticationOptions()
{
    AppId = "應用程式ID",
    AppSecret = "應用程式密鑰",

    Provider = new FacebookAuthenticationProvider()
    {
        OnAuthenticated = async (context) =>
        {
            context.Identity.AddClaim(
                new System.Security.Claims.Claim(
                    "urn:facebook:access_token",
                    context.AccessToken,
                    "http://www.w3.org/2001/XMLSchema#string",
                    "Facebook"));

            context.Identity.AddClaim(
                new System.Security.Claims.Claim(
                    "urn:facebook:email",
                    context.Email,
                    "http://www.w3.org/2001/XMLSchema#string",
                    "Facebook"));
        }
    }

};

facebookOptions.Scope.Add("email");

app.UseFacebookAuthentication(facebookOptions);
備註:有哪些 Scope 可以加入請參考 Permissions with Facebook Login 文件說明。
3. 修改 Controllers\AccountController.cs 檔案
將 SignInAsync() 整個方法置換成以下程式碼:
private async Task SignInAsync(ApplicationUser user, bool isPersistent)
{
    var identity = await UserManager.CreateIdentityAsync(user, DefaultAuthenticationTypes.ApplicationCookie);

    ClaimsIdentity ext = await AuthenticationManager.GetExternalIdentityAsync(DefaultAuthenticationTypes.ExternalCookie);

    if (ext != null)
    {
        var ignoreClaim = "http://schemas.xmlsoap.org/ws/2005/05/identity/claims";

        foreach (var c in ext.Claims)
        {
            if (!c.Type.StartsWith(ignoreClaim))
                if (!identity.HasClaim(c.Type, c.Value))
                    identity.AddClaim(c);
        }
    }

    AuthenticationManager.SignOut(DefaultAuthenticationTypes.ExternalCookie);
    AuthenticationManager.SignIn(new AuthenticationProperties() { IsPersistent = isPersistent }, identity);
}
大功告成!
之後只要使用者登入,就可以用以下程式碼取得 Facebook Access Token 的 Claim 物件:
Claim token = ((ClaimsIdentity)User.Identity).FindFirst("urn:facebook:access_token");
若要取得 Token 值,可以取得該物件的 Value 屬性:
Claim token = ((ClaimsIdentity)User.Identity).FindFirst("urn:facebook:access_token");

if (token != null)
{
    ViewBag.token = token.Value;
}
底下示範 Facebook 上面註冊 Applications 的設定步驟:
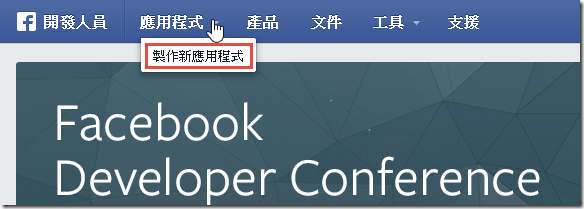
1. 前往 https://developers.facebook.com/ 開發人員網站
2. 製作新應用程式
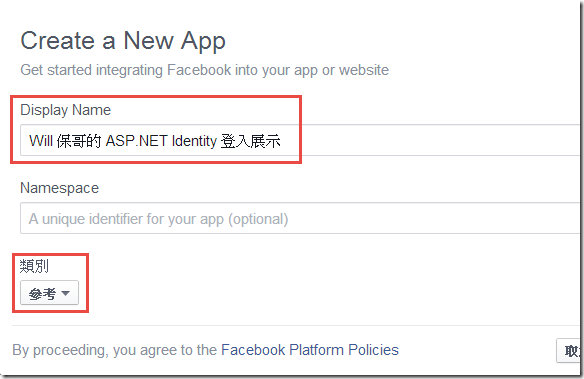
3. 填寫顯示名稱 ( Display Name ) 與 任選一個類別,然後點選「建立應用程式」
4. 然後輸入一個考驗人腦極限的圖片驗證碼 ( captcha )
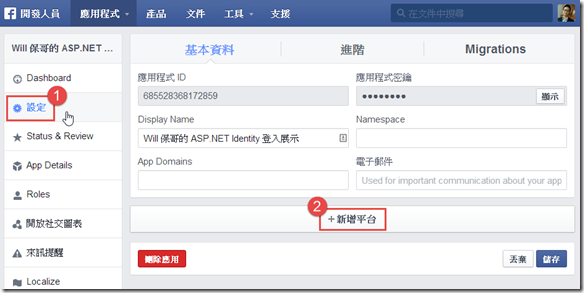
5. 點選「設定」—>「新增平台」
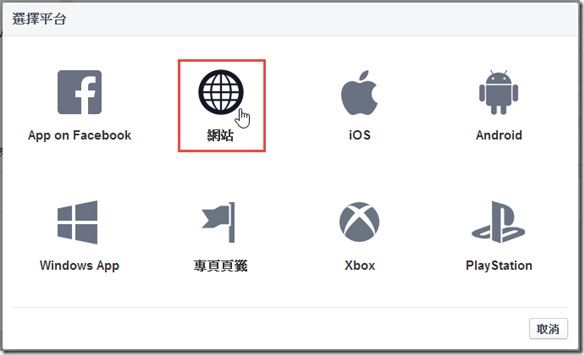
6. 請選擇「網站」,因為我們打算從自己的網站透過 ASP.NET Identity 登入 Facebook
7. 請輸入你要測試的網站網址,即便為 Localhost 也沒關係,請把 Visual Studio 2013 提供的網站網址貼上「網站URL」欄位。
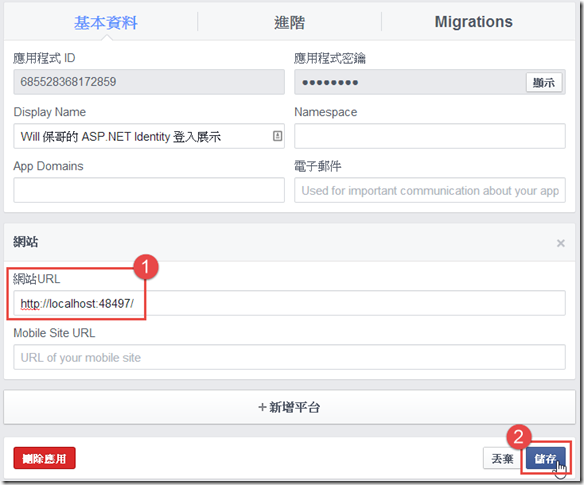
8. 取得最上方的「應用程式ID」與「應用程式密鑰」,其中「應用程式密鑰」部分須按右邊的「顯示」按鈕才會顯示該欄位的內容,請將「應用程式ID」與「應用程式密鑰」寫入 App_Start\Startup.Auth.cs 檔案的 Facebook 設定裡面。
相關連結