Office Word 內建的合併列印是個非常強大且實用的功能,若搭配 Excel 當成來源資料庫,更可批次建立大量的列印標籤。不過,不光光只是製作標籤而已,怎樣購買與套用現成的標籤貼紙,讓你在製作完標籤文件後,能夠順利地列印出來,那就不太容易能一次OK了。本篇文章的目的就是打算用逐步教學的方式,解說合併列印標籤的完整過程。
1. 請先用 Excel 整理好一份資料來源,方便我們等等自動化製作標籤。

※ 建議文件儲存成 Excel 2007 以上格式,之後在選取資料來源時比較不會出問題。

2. 去文具店買現成的標籤貼紙,等標籤印上去之後,可以直接把貼紙撕下來,就可以直接貼在信封或其他東西上面了。由於標籤紙規格很多、很雜,我都是買 LONGDER 的牌子,因為它提供非常完整的 Word 標籤列印參數,可以方便在之後的步驟設定。

3. 接著開啟一份空的 Word 文件,然後啟動合併列印標籤
請點選「郵件」/「啟動合併列印」/「標籤」
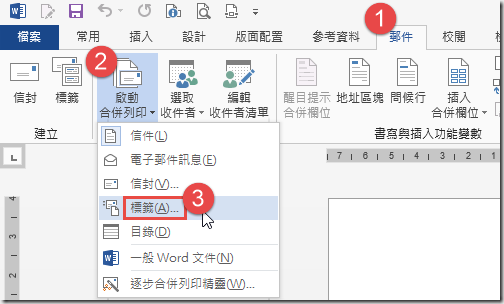
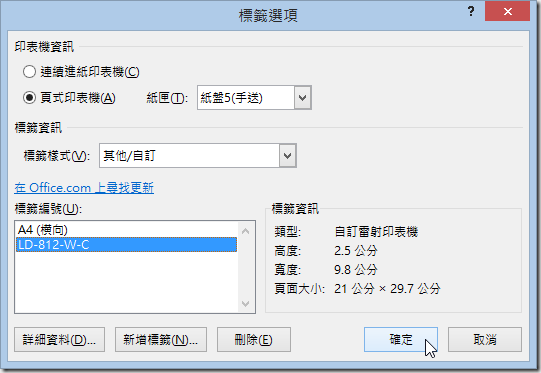
如下圖示,有幾個重點:
- 印表機資訊:我公司是用雷射印表機,所以一定是「頁式印表機」,而一般列印標籤通常都是手動送紙,所以我選擇手動送紙的紙盤。
- 標籤資訊:除非你買的到支援 Word 內建標籤樣式的「標籤紙」,否則通常你會選「其他/自訂」,等等我們就會自行新增標籤
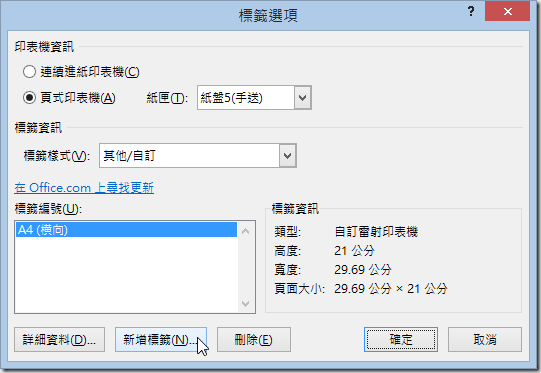
當你找不到適合的標籤樣式,你就要自行「新增標籤」規格了,因此請點選「新增標籤」按鈕。
這時請先抽出一張標籤紙,LONGDER 這牌子每張標籤紙上方與下方都有寫著完整的標籤資訊,這真的非常貼心,你只要把這些資訊貼上新增標籤時的每個欄位即可!

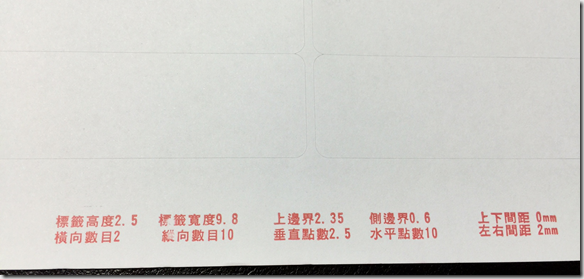
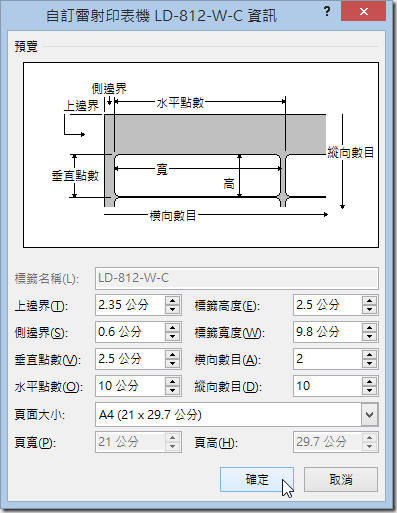
如下圖示:(建議先設定標籤高度、寬度、橫向數目與縱向數目,再輸入左邊的上邊界、側邊界、垂直點數、水平點數)
※ 如果無法按下「確定」按鈕,並一直出現錯誤訊息,可能是你的頁面大小沒有選對。
設定完成後的畫面如下:
按下確定後,標籤的位置就被設定好了,如下圖示每一格都是一個標籤可以列印的位置
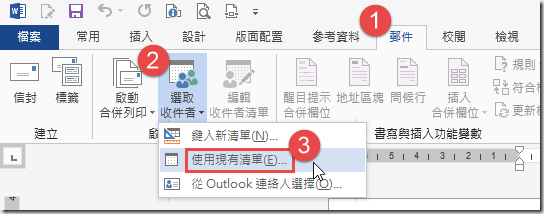
4. 載入 Excel 當成我們的來源資料
請點選「郵件」/「選取收件者」/「使用現有清單」
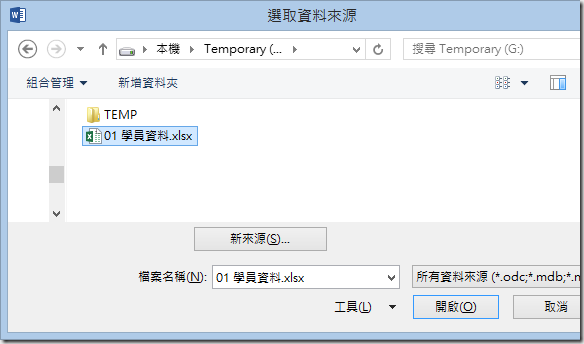
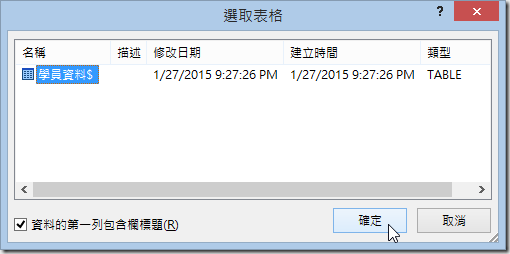
選取 Excel 檔案
確認資料來源
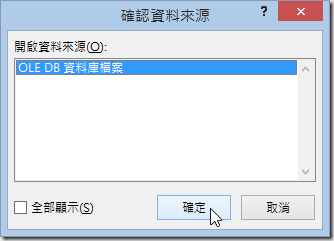
選擇 Excel 中的工作表
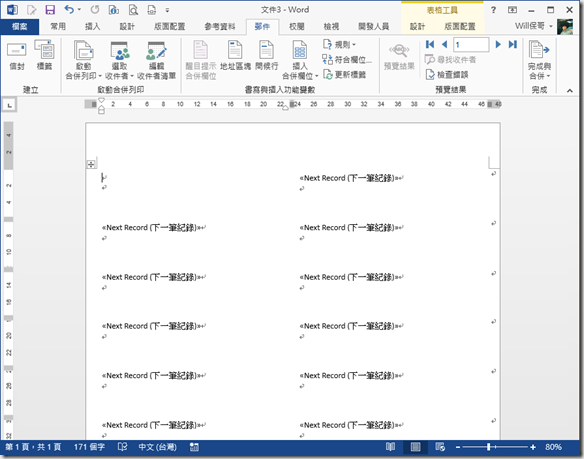
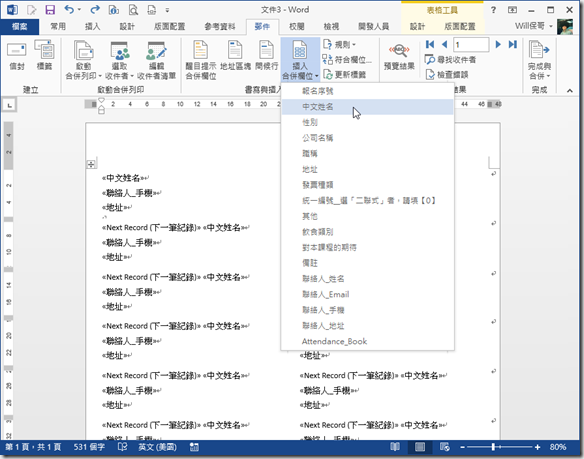
5. 載入後,就可以使用「插入合併欄位」將變數插入到文件之中。請記得要將每一格都填上變數,這樣他才會自動把資料來源中的每筆資料自動填每一個標籤的列印區塊。
你可以直接點擊「預覽結果」看一下合併列印標籤後的樣子

最後你必須完成合併動作,執行「郵件」/「完成與合併」動作。
- 你可以選擇「編輯個別文件」,產生一份獨立的標籤文件 (套用資料後的)。
- 也可以選擇「列印文件」直接將現有的資料列印出來。


相關連結